Cara Instalasi Prestashop Menggunakan Nginx di CentOS 8

Prestashop adalah sebuah CMS yang diperuntukan untuk e-commerce, prestashop sendiri open source (bebas) dalam artian semua orang dapat menggunakan, mengembangkan dan berpartisipasi sehingga CMS ini tetap up to date.
Prestashop sudah menyediakan berbagai macam themes dan addons yang dapat Anda gunakan secara free dan dapat disesuaikan dengan produk yang ingin Anda jual tentunya.
Sangat banyak fitur – fitur e-commerce yang dapat Anda gunakan jika Anda menggunakan Prestashop.
Untuk mengetahui system requirement prestashop Anda dapat klik pada tautan berikut: PrestaShop System Requirements
Sedangkan untuk mengikuti tutorial kali ini pastikan Anda sudah melakukan instalasi service web server (nginx), database (mariadb/mysql), dan php versi 7.x (beserta module) yang dibutuhkan.
Jika belum silakan mengikuti panduan berikut, terlebih dahulu:
- Cara Instalasi Nginx Di CentOS 8
- Cara Instalasi PHP 7 di CentOS 8
- Cara Instalasi Database MariaDB di CentOS 8
Pastikan service nginx, php-fpm dan database Anda running
1
2
3
4
5
6
7
8
[root@tutorial ~]#
[root@tutorial ~]# systemctl status nginx |grep Active
   Active: active (running) since Mon 2020-08-24 07:38:54 UTC; 6h ago
[root@tutorial ~]# systemctl status php-fpm |grep Active
   Active: active (running) since Mon 2020-08-24 11:22:29 UTC; 3h 16min ago
[root@tutorial ~]# systemctl status mariadb |grep Active
   Active: active (running) since Sun 2020-08-23 04:11:36 UTC; 1 day 10h ago
[root@tutorial ~]#
Kemudian, install beberapa module php tambahan sebagai persyaratan instalasi prestashop
1
2
[root@tutorial ~]#
[root@tutorial ~]# dnf install php-{spl,hash,ctype,json,mbstring,zip,gd,curl,xml,common} -y
Jika sudah, selanjutnya menentukan root direktori prestashop dan unduh file prestashop, disini kami menggunakan prestashop version 1.7.6.4 jika ingin menggunakan atau ingin tahu versi latest dapat dilihat pada link berikut: Download PrestaShop
1
2
3
4
5
6
7
8
9
10
11
12
13
14
15
16
17
18
19
20
21
22
23
24
[root@tutorial ~]#
[root@tutorial ~]# cd /usr/share/nginx/
[root@tutorial nginx]#
[root@tutorial nginx]# mkdir prestashop
[root@tutorial nginx]#
[root@tutorial nginx]# wget wget https://download.prestashop.com/download/releases/prestashop_1.7.6.4.zip
--2020-08-24 13:54:43-- http://wget/
Resolving wget (wget)... failed: Name or service not known.
wget: unable to resolve host address ‘wget’
--2020-08-24 13:54:43-- https://download.prestashop.com/download/releases/prestashop_1.7.6.4.zip
Resolving download.prestashop.com (download.prestashop.com)... 23.74.228.148
Connecting to download.prestashop.com (download.prestashop.com)|23.74.228.148|:443... connected.
HTTP request sent, awaiting response... 200 OK
Length: unspecified [application/zip]
Saving to: ‘prestashop_1.7.6.4.zip’

prestashop_1.7.6.4.zip [<=>] 59.47M 14.7MB/s in 5.3s

2020-08-24 13:54:56 (11.2 MB/s) - ‘prestashop_1.7.6.4.zip’ saved [62358828]

FINISHED --2020-08-24 13:54:56--
Total wall clock time: 13s
Downloaded: 1 files, 59M in 5.3s (11.2 MB/s)
[root@tutorial nginx]#
Unzip file prestashop yang baru saja kita unduh
1
2
3
4
5
6
7
[root@tutorial nginx]#
[root@tutorial nginx]# unzip prestashop_1.7.6.4.zip -d prestashop/
Archive: prestashop_1.7.6.4.zip
  inflating: prestashop/prestashop.zip
  inflating: prestashop/index.php
  inflating: prestashop/Install_PrestaShop.html
[root@tutorial nginx]#
Berikan hak akses dan owner terhadap direktori prestashop
1
2
[root@tutorial nginx]# chown -R nginx:nginx prestashop
[root@tutorial nginx]# chmod -R 777 prestashop
Noted: permission 777 hanya untuk instalasi saja, diakhir tutorial akan diubah menjadi 755 setelah instalasi dilakukan
Selanjutnya membuat database prestashop
1
2
3
4
5
6
7
8
9
10
11
12
13
14
15
16
17
18
19
20
21
22
23
24
25
26
[root@tutorial nginx]#
[root@tutorial nginx]# mysql -u root -p
Enter password:
Welcome to the MariaDB monitor. Commands end with ; or \g.
Your MariaDB connection id is 198
Server version: 10.3.17-MariaDB MariaDB Server

Copyright (c) 2000, 2018, Oracle, MariaDB Corporation Ab and others.

Type 'help;' or '\h' for help. Type '\c' to clear the current input statement.

MariaDB [(none)]> CREATE DATABASE prestashop;
Query OK, 1 row affected (0.001 sec)

MariaDB [(none)]> CREATE USER 'userpresta'@'localhost' IDENTIFIED BY 'passwordpresta';
Query OK, 0 rows affected (0.001 sec)

MariaDB [(none)]> GRANT ALL PRIVILEGES ON prestashop.* TO 'userpresta'@'localhost';
Query OK, 0 rows affected (0.002 sec)

MariaDB [(none)]> FLUSH PRIVILEGES;
Query OK, 0 rows affected (0.001 sec)

MariaDB [(none)]> exit
Bye
[root@tutorial nginx]#
Noted: silakan di catat nama database, username dan password database
Jika sudah silakan membuat server block Nginx untuk prestashop
1
2
[root@tutorial nginx]#
[root@tutorial nginx]# vim /etc/nginx/conf.d/prestashop.conf
Berikut isi full konfigurasi prestashop, silakan disesuaikan saja
1
2
3
4
5
6
7
8
9
10
11
12
13
14
15
16
17
18
19
server {
        listen 80;
        server_name prestashop.nurhamim.my.id;
        root /usr/share/nginx/prestashop;
        index index.php index.html index.htm;

        location / {
                try_files $uri $uri/ /index.php?$query_string;
        }

        location ~ \.php {
                include fastcgi.conf;
                fastcgi_split_path_info ^(.+\.php)(/.+)$;
                fastcgi_pass unix:/run/php-fpm/www.sock;
        }
        location ~ /\.ht {
                deny all;
        }
}
Noted: disini kami menggunakan unix socket untuk komunikasi nginx ke php-fpm nya jika ingin menggunakan tcp/port silakan ubah koneksinya referensinya dapat dilihat pada link berikut: Komunikasi Nginx dan PHP-FPM Menggunakan Unix atau TCP/IP Socket
Selanjutnya verifikasi konfigurasi nginx pastikan ada kesalahan konfigurasi pada server block Nginx
1
2
3
4
5
[root@tutorial nginx]#
[root@tutorial nginx]# nginx -t
nginx: the configuration file /etc/nginx/nginx.conf syntax is ok
nginx: configuration file /etc/nginx/nginx.conf test is successful
[root@tutorial nginx]#
Reload nginx dan php-fpm
1
2
3
[root@tutorial nginx]#
[root@tutorial nginx]# systemctl reload nginx
[root@tutorial nginx]# systemctl reload php-fpm
Selanjutnya pastikan subdomain atau domain Anda sudah diarahkan ke IP Public VM/VPS Anda dengan cara menambahkan A record contohnya

Verifikasi dapat menggunakan ping

Jika sudah silakan akses sub domain atau domain Anda melalui browser
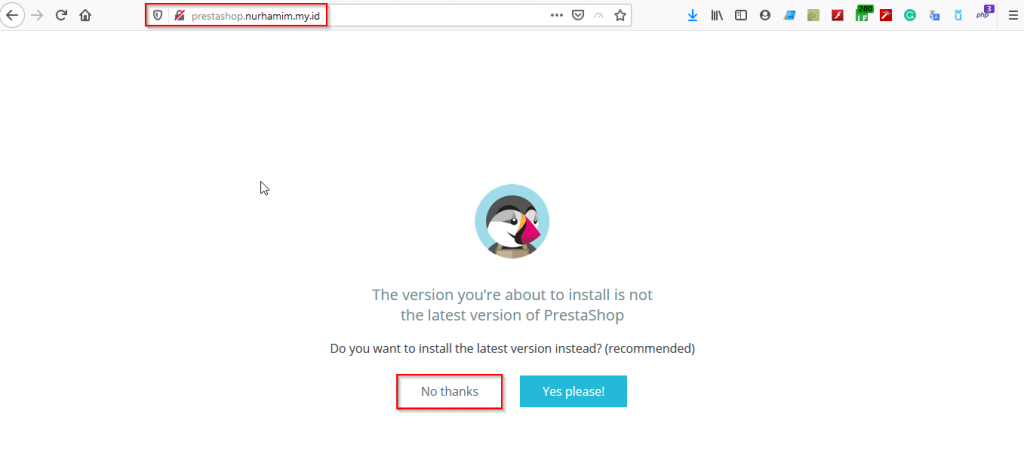
Gambar diatas klik No thanks, dan tunggu proses instalasi prestashop
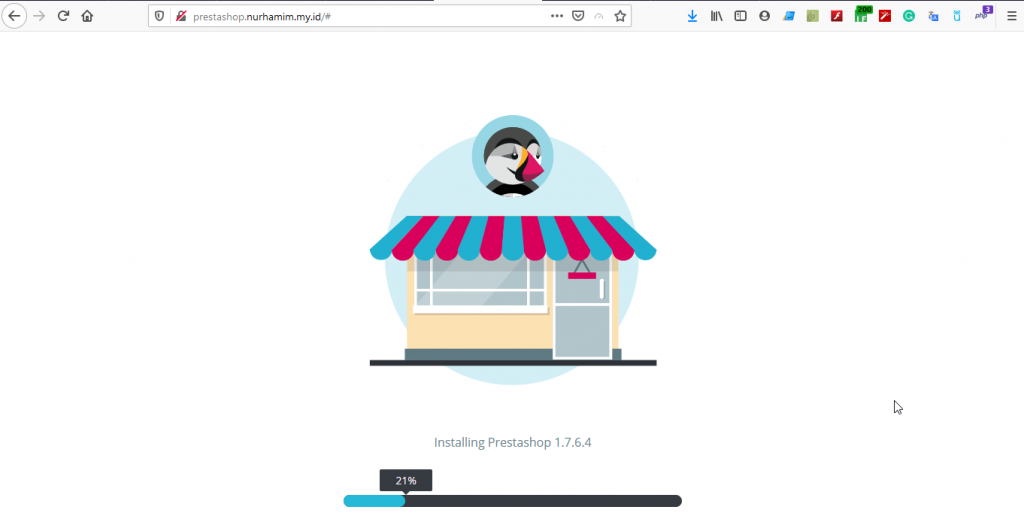
Jika sudah Anda akan melihat tampilan seperti berikut ini
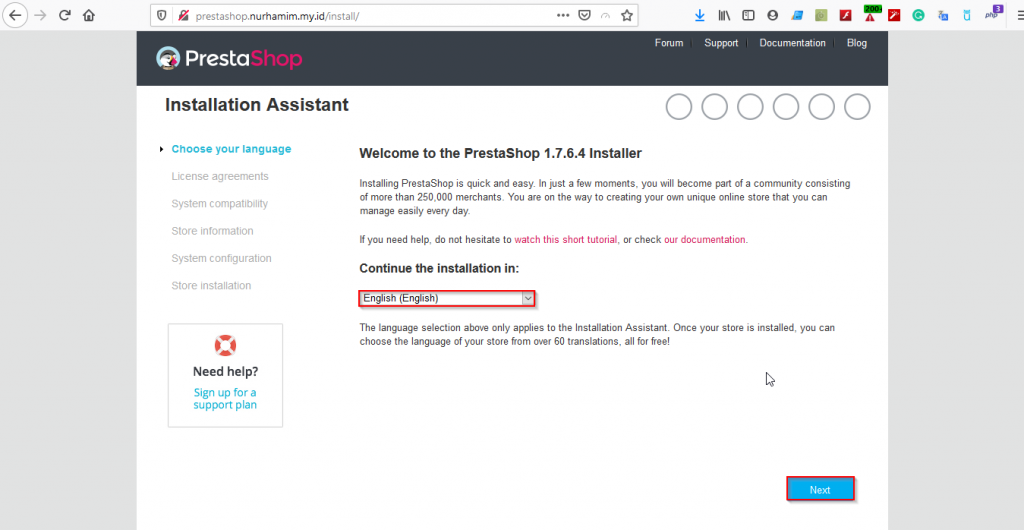
Gambar diatas meminta Anda untuk memilih bahasa yang ingin Anda gunakan klik Next
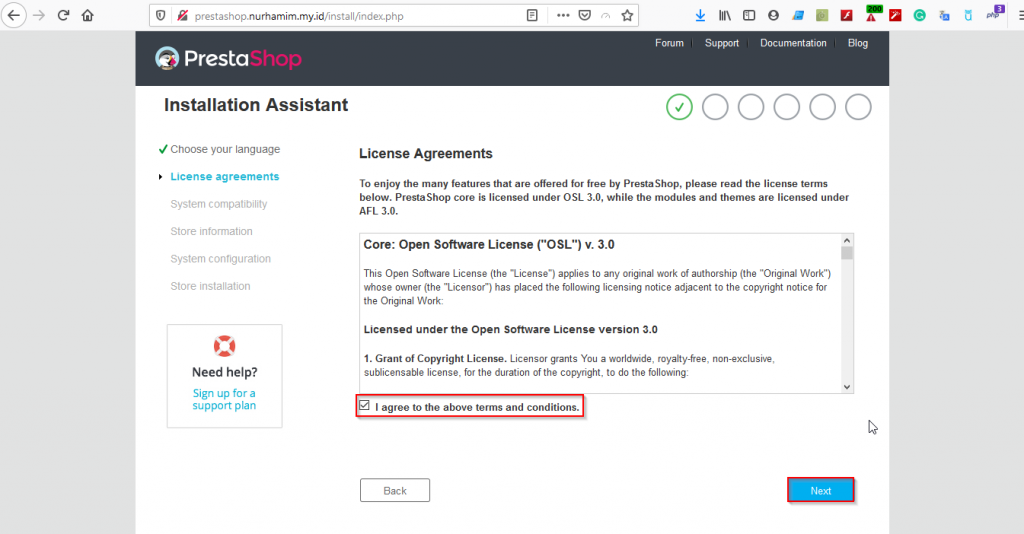
Centang pada License Agreements lalu klik Next
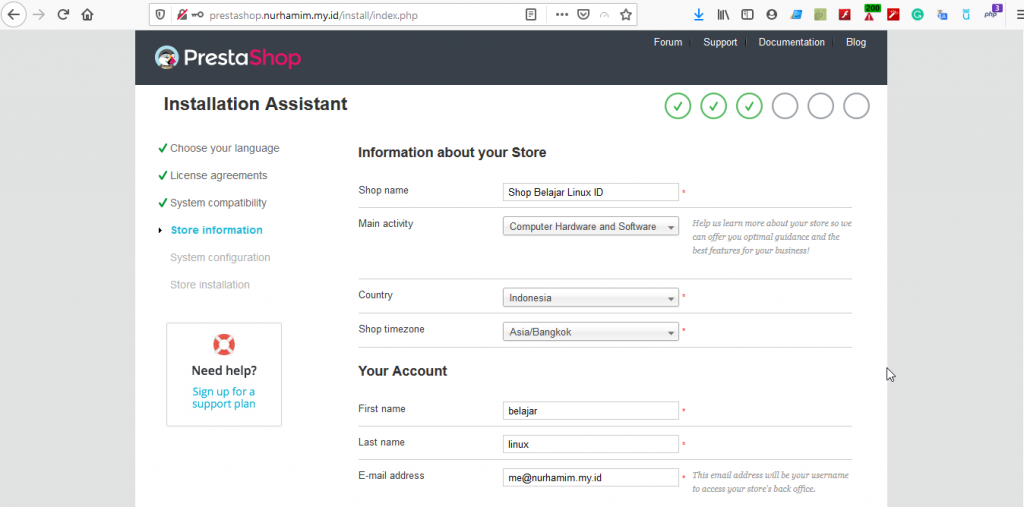
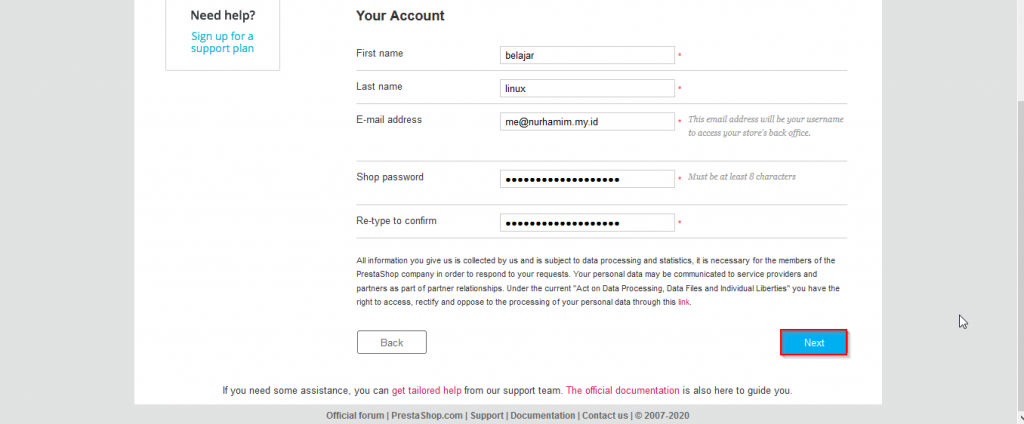
Isikan informasi toko online Anda secara detail dan catat email beserta password yang Anda input yang nantinya akan digunakan sebagai username dan password login ke Administrator, klik Next
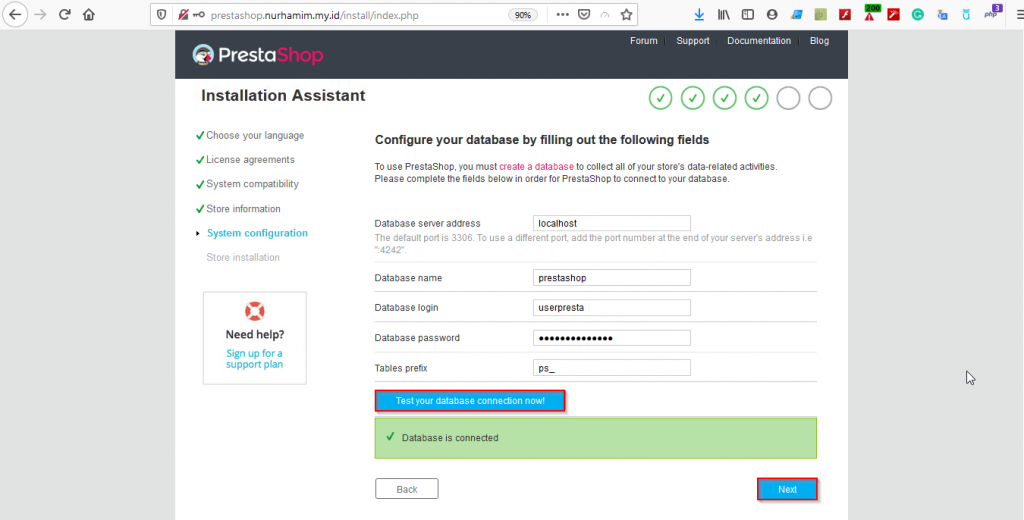
Konfigurasi dan verifikasi database, silakan input database, username dan password database yang sudah dibuat diawal, klik Next
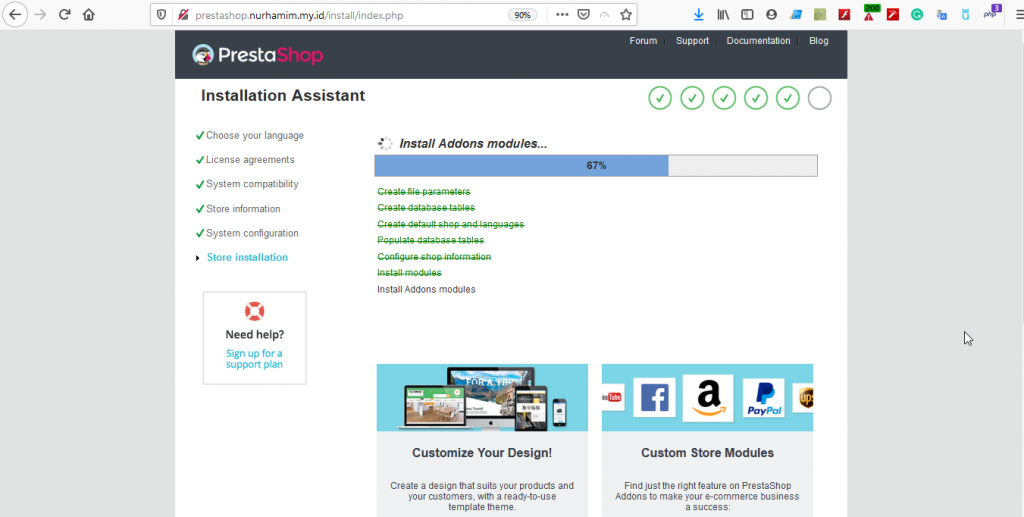
Tunggu proses instalasi sampai selesai yang membutuhkan waktu, jika sudah hasilnya akan seperti berikut ini
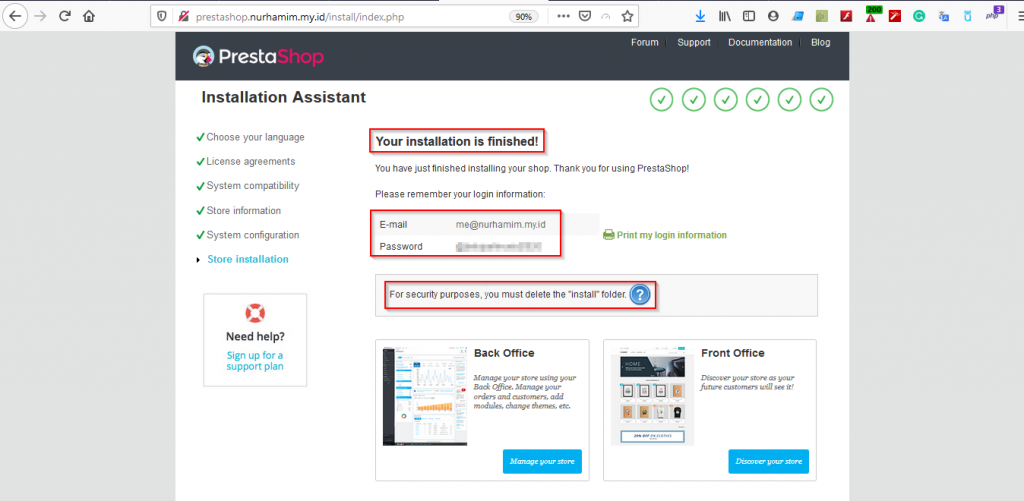
Perhatikan gambar diatas untuk keamanan Anda perlu hapus folder install
1
2
3
4
[root@tutorial nginx]#
[root@tutorial nginx]# cd prestashop
[root@tutorial prestashop]# rm -rf install/
[root@tutorial prestashop]#
Kemudian, akses administrator prestashop dengan cara ketikan subdomain atau domain Anda di browser contoh: http://prestashop.nurhamim.my.id/admin nantinya Anda akan diarahkan (redirect otomatis) ke URL Admin contohnya
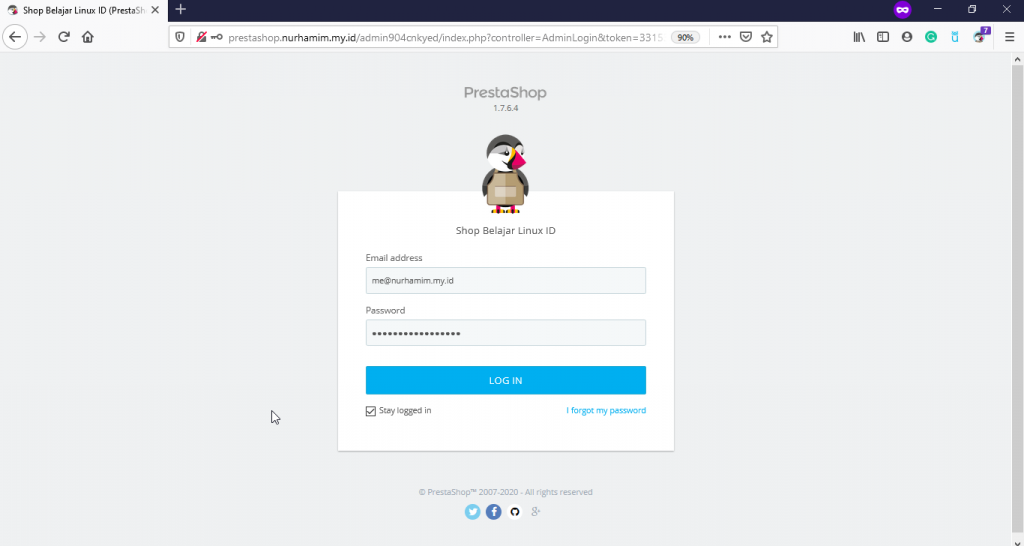
Silakan di catat URL Admin diatas, dan input email dan password sebelumnya, jika berhasil akan nampak seperti berikut ini tampilan Administrator prestashop
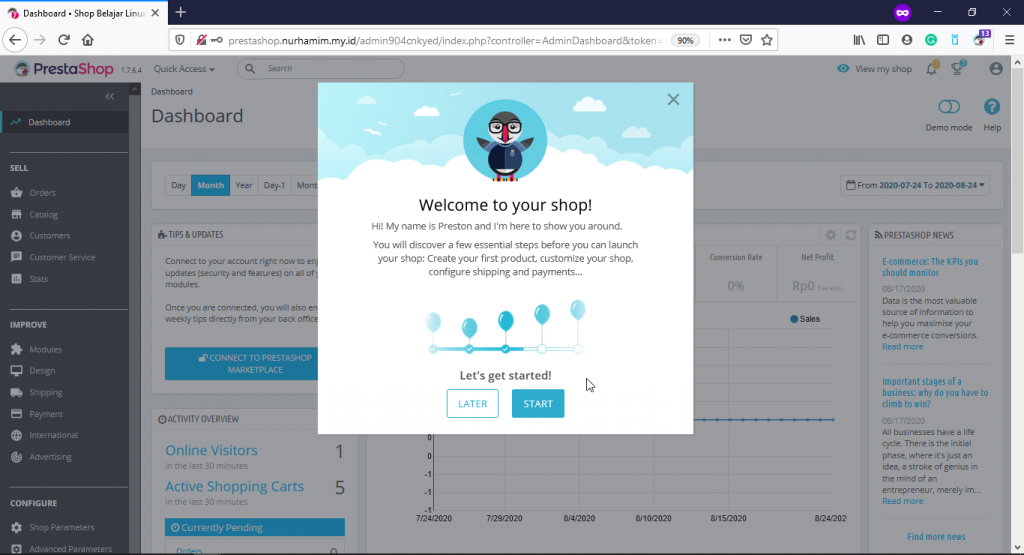
Klik Start
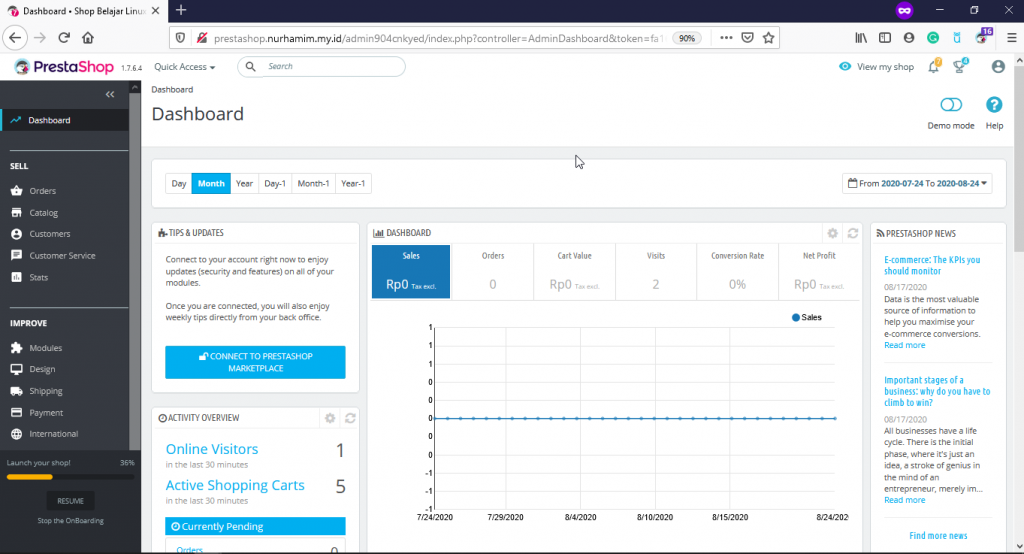
Berikut tampilan themes default dari prestashop

Langkah terakhir sesuaikan permission sesuai informasi diawal dan reload nginx
1
2
3
[root@tutorial nginx]#
[root@tutorial nginx]# chmod -R 755 prestashop
[root@tutorial nginx]# systemctl reload nginx
Selamat, instalasi prestashop sudah selesai dilakukan.
Selamat mencoba 😁

