
Drupalsalah satu dari sekian banyak nya CMS (content management system) yang open source (bebas) digunakan, dikembangkan dan di customisasi sesuai kebutuhan. Drupal di tulis menggunakan PHP dan didistribusikan di bawah GNU General Public License.
Drupaldapat digunakan untuk perbagai jenis kebutuhan mulai dari blog pribadi, company perusahaan dan yang lainnya.
Drupal juga menyediakan lebih dari 2 ribu themes yang dapat Anda gunakan secara gratis, detailnya dapat di lihat pada link berikut: https://www.drupal.org/project/project_theme
Untuk mengikuti tutorial instalasi Drupal kali ini pastikan Anda sudah melakukan instalasi web server Nginx, php 7.x (beserta module yang dibutuhkan), dan tentunya database server bisa menggunakan mariadb/mysql, selengkapnya dapat merujuk pada beberapa tautan berikut:
- Cara Instalasi Nginx Di CentOS 8
- Cara Instalasi PHP 7 di CentOS 8
- Cara Instalasi Database MariaDB di CentOS 8
Memastikan service nginx, php-fpm dan mariadb telah running
1
2
3
4
5
6
7
[root@tutorial ~]# systemctl status nginx |grep Active
   Active: active (running) since Tue 2020-08-25 07:37:07 UTC; 1min 51s ago
[root@tutorial ~]# systemctl status php-fpm |grep Active
   Active: active (running) since Tue 2020-08-25 07:38:48 UTC; 16s ago
[root@tutorial ~]# systemctl status mariadb |grep Active
   Active: active (running) since Tue 2020-08-25 07:37:13 UTC; 1min 56s ago
[root@tutorial ~]#
Disini kami menggunakan PHP 7.4, silakan install beberapa module php yang dibutuhkan
1
2
3
4
5
6
7
8
[root@tutorial ~]# php --version
PHP 7.4.9 (cli) (built: Aug 4 2020 08:28:13) ( NTS )
Copyright (c) The PHP Group
Zend Engine v3.4.0, Copyright (c) Zend Technologies
    with Zend OPcache v7.4.9, Copyright (c), by Zend Technologies
[root@tutorial ~]#
[root@tutorial ~]#
[root@tutorial ~]# dnf install php-curl php-mbstring php-gd php-xml php-pear php-fpm php-mysql php-pdo php-opcache php-json php-zip -y
Menentukan path direktori root Drupal dan untuk Drupal
1
2
3
4
5
6
7
8
9
10
11
12
13
14
15
16
17
18
19
20
21
[root@tutorial ~]#
[root@tutorial ~]# cd /usr/share/nginx/
[root@tutorial nginx]#
[root@tutorial nginx]# wget https://www.drupal.org/download-latest/zip
--2020-08-24 19:52:15-- https://www.drupal.org/download-latest/zip
Resolving www.drupal.org (www.drupal.org)... 151.101.2.217, 151.101.66.217, 151.101.130.217, ...
Connecting to www.drupal.org (www.drupal.org)|151.101.2.217|:443... connected.
HTTP request sent, awaiting response... 302 Moved Temporarily
Location: https://ftp.drupal.org/files/projects/drupal-9.0.3.zip [following]
--2020-08-24 19:52:16-- https://ftp.drupal.org/files/projects/drupal-9.0.3.zip
Resolving ftp.drupal.org (ftp.drupal.org)... 151.101.2.217, 151.101.66.217, 151.101.130.217, ...
Connecting to ftp.drupal.org (ftp.drupal.org)|151.101.2.217|:443... connected.
HTTP request sent, awaiting response... 200 OK
Length: 28325753 (27M) [application/zip]
Saving to: ‘zip’

zip 100%[===============================================>] 27.01M 31.9MB/s in 0.8s

2020-08-24 19:52:17 (31.9 MB/s) - ‘zip’ saved [28325753/28325753]

[root@tutorial nginx]#
Noted: Disini kami menggunakan Drupal versi latest yang dapat di lihat pada link berikut: https://www.drupal.org/download
Unzip file Drupal yang baru saja di unduh
1
2
[root@tutorial nginx]#
[root@tutorial nginx]# unzip zip
Ubah penamaan Drupal sesuai keinginan Anda
1
2
[root@tutorial nginx]#
[root@tutorial nginx]# mv drupal-9.0.3/ drupal
Berikan hak akses dan owner untuk direktori Drupal
1
2
3
[root@tutorial nginx]#
[root@tutorial nginx]# chown -R nginx:nginx drupal/
[root@tutorial nginx]# chmod -R 755 drupal/
Membuat direktori files dan copy pengaturan (settings.conf) default dari Drupal
1
2
3
4
5
[root@tutorial nginx]#
[root@tutorial nginx]# mkdir drupal/sites/default/files
[root@tutorial nginx]# cd drupal/sites/default/
[root@tutorial default]# cp -p default.settings.php setting.php
[root@tutorial default]#
Membuat database Drupal
1
2
3
4
5
6
7
8
9
10
11
12
13
14
15
16
17
18
19
20
21
22
23
[root@tutorial default]#
[root@tutorial default]# mysql -u root -p
Enter password:
Welcome to the MariaDB monitor. Commands end with ; or \g.
Your MariaDB connection id is 496
Server version: 10.3.17-MariaDB MariaDB Server

Copyright (c) 2000, 2018, Oracle, MariaDB Corporation Ab and others.

Type 'help;' or '\h' for help. Type '\c' to clear the current input statement.

MariaDB [(none)]> CREATE DATABASE drupal;
Query OK, 1 row affected (0.001 sec)

MariaDB [(none)]> GRANT ALL ON drupal.* TO 'user_drupal'@'localhost' IDENTIFIED BY 'password_drupal';
Query OK, 0 rows affected (0.002 sec)

MariaDB [(none)]> FLUSH PRIVILEGES;
Query OK, 0 rows affected (0.001 sec)

MariaDB [(none)]> quit
Bye
[root@tutorial default]#
Noted: Harap dicatat untuk nama database, user dan password karena dibutuhkan pada saat instalasi
Jika sudah selanjutnya membuat server block Nginx
1
2
[root@tutorial default]#
[root@tutorial default]# vim /etc/nginx/conf.d/drupal.conf
Berikut full konfigurasi server block nya
1
2
3
4
5
6
7
8
9
10
11
12
13
14
15
16
17
18
19
server {
        listen 80;
        server_name drupal.nurhamim.my.id;
        root /usr/share/nginx/drupal;
        index index.php index.html index.htm;

        location / {
                try_files $uri $uri/ /index.php?$query_string;
        }

        location ~ \.php {
                include fastcgi.conf;
                fastcgi_split_path_info ^(.+\.php)(/.+)$;
                fastcgi_pass unix:/run/php-fpm/www.sock;
        }
        location ~ /\.ht {
                deny all;
        }
}
Noted: Silakan disesuaikan path direktori dan server_name nya, dan disini kami menggunakan unix socket untuk komunikasi nginx ke php-fpm.
Jika sudah, silakan reload php-fpm dan nginx
1
2
3
[root@tutorial default]#
[root@tutorial default]# systemctl reload nginx
[root@tutorial default]# systemctl reload php-fpm
Selanjutnya menambahkan A record pada domain atau subdomain dan di arahkan ke IP Public VM atau VPS contohnya
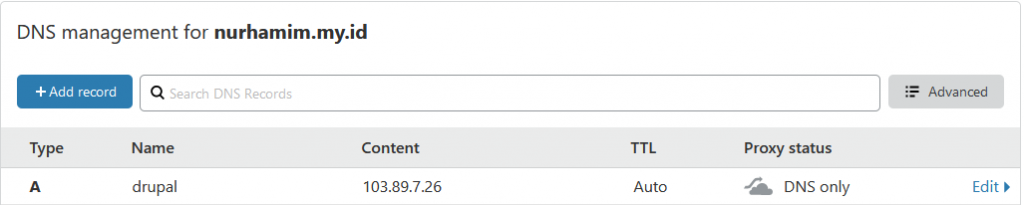
Verifikasi bisa menggunakan ping

Akses subdomain atau domain Anda melalui browser untuk melanjutkan proses instalasi.
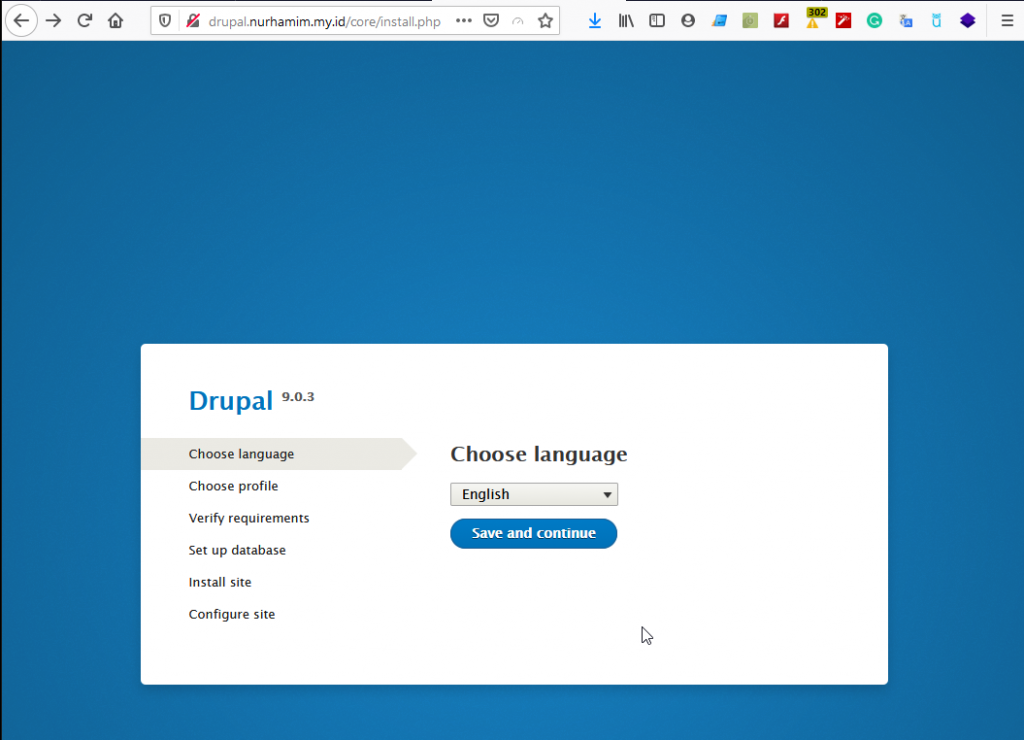
Gambar diatas Anda diminta untuk memilih Bahasa yang ingin digunakan lalu Save and continue
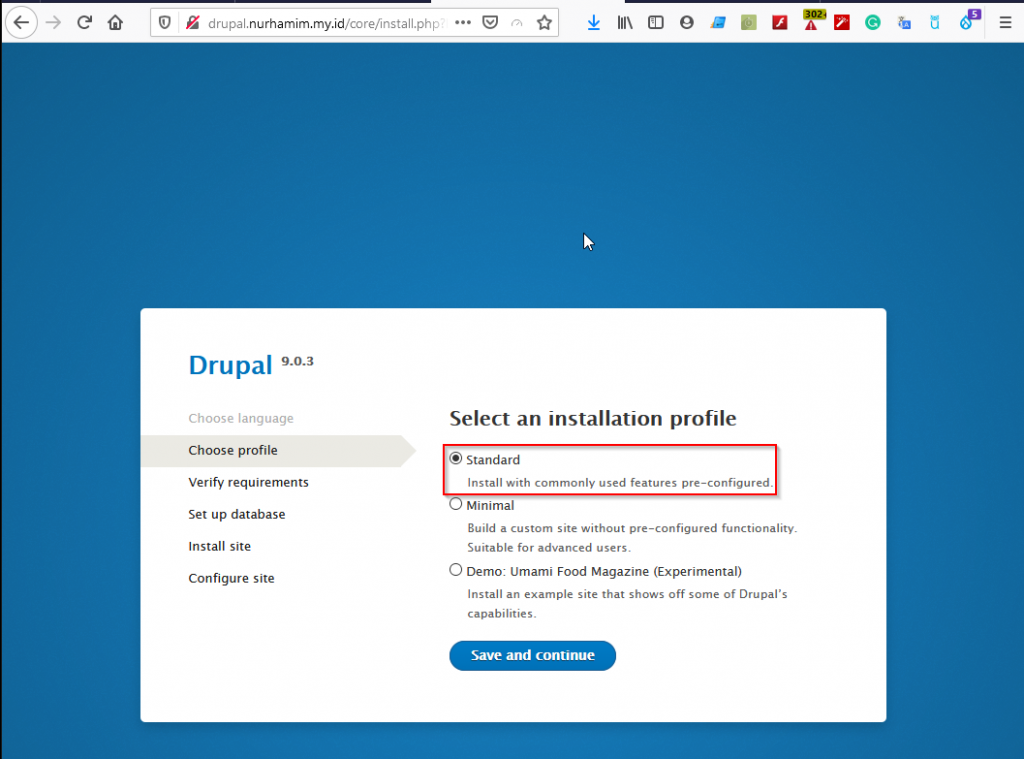
Pilih profile instalasi, disini kami menggunakan Standard silakan disesuaikan dengan kebutuhan, Save and continue
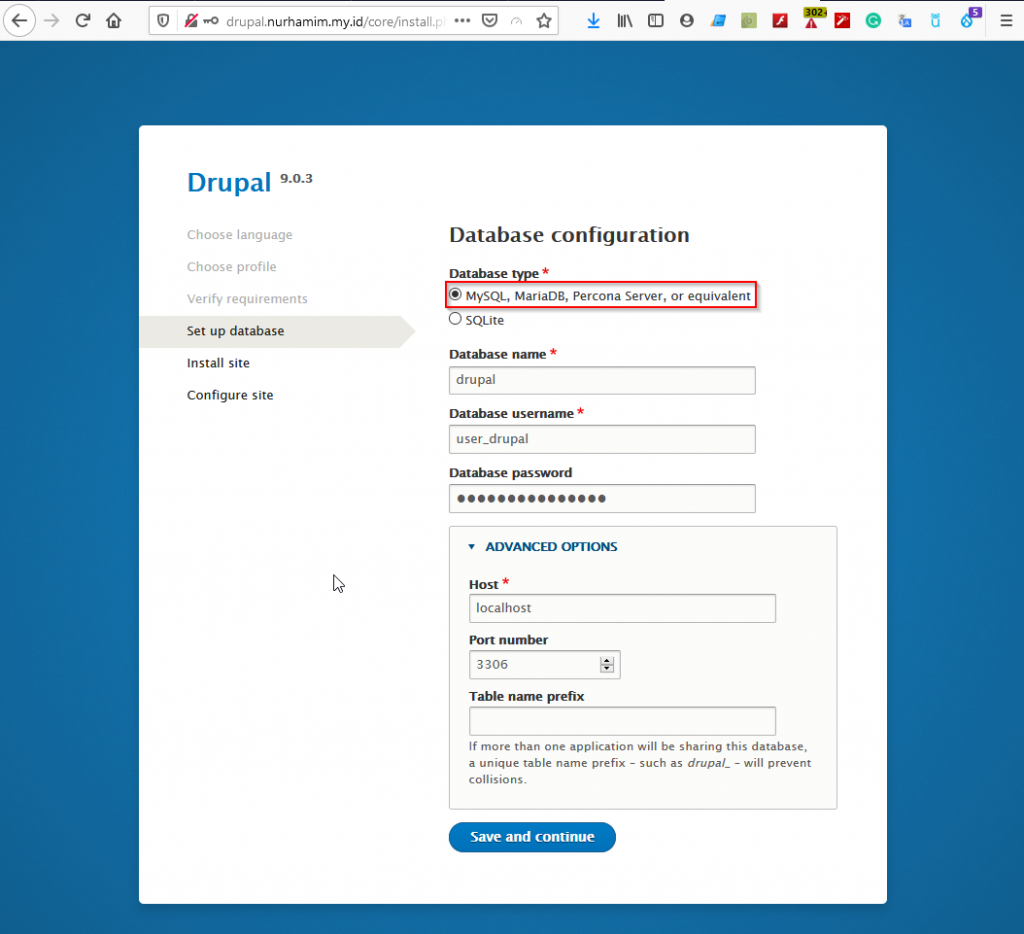
Silakan input nama, username, dan password database yang sudah dibuat sebelumny, Save and continue
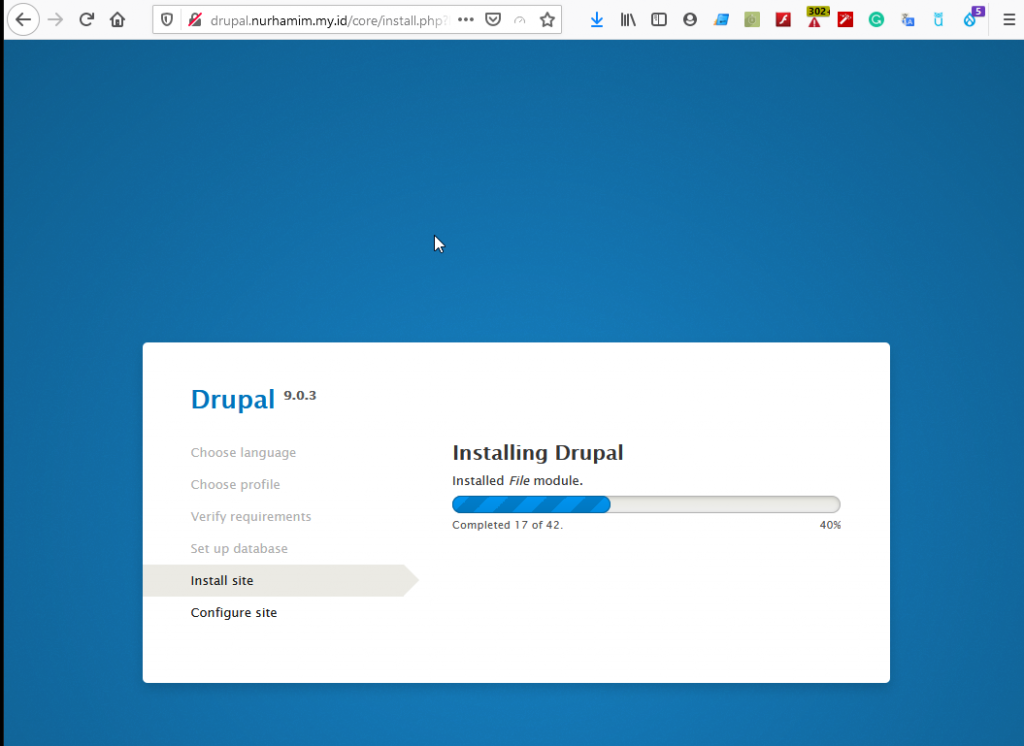
Menunggu proses instalasi Drupal sampai selesai
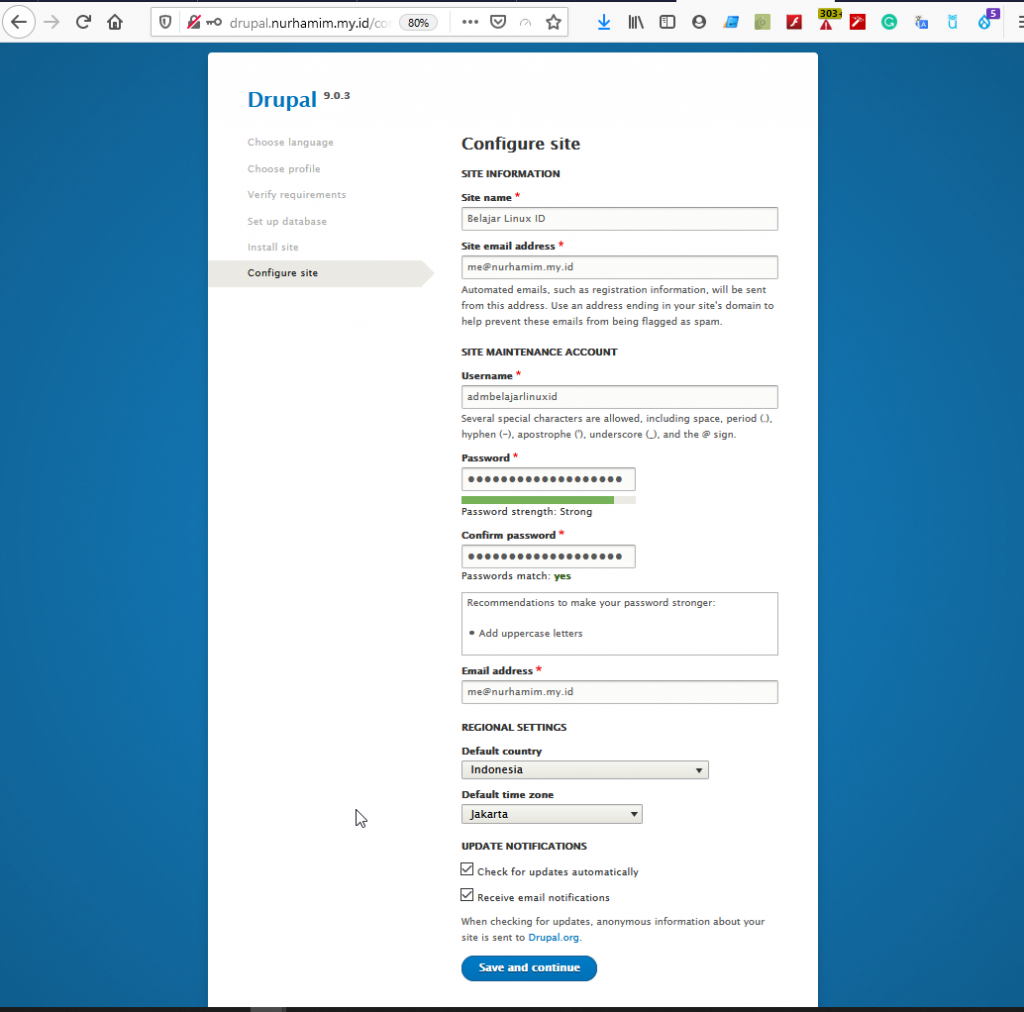
Set-up profile dan menentukan username dan password login ke administrator Drupal, Save and continue
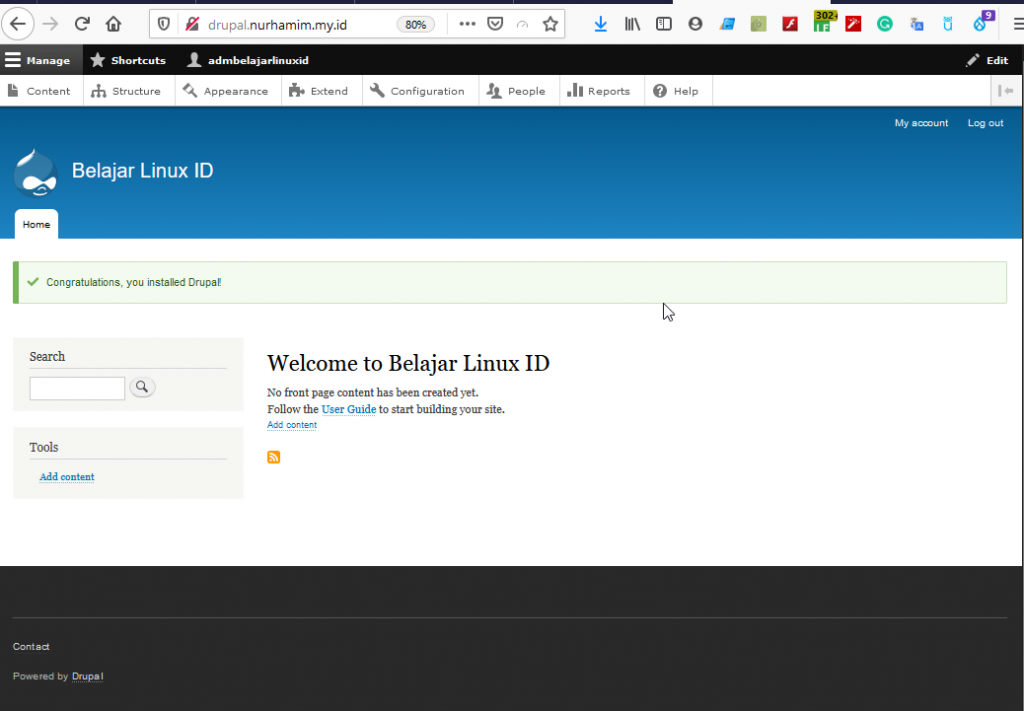
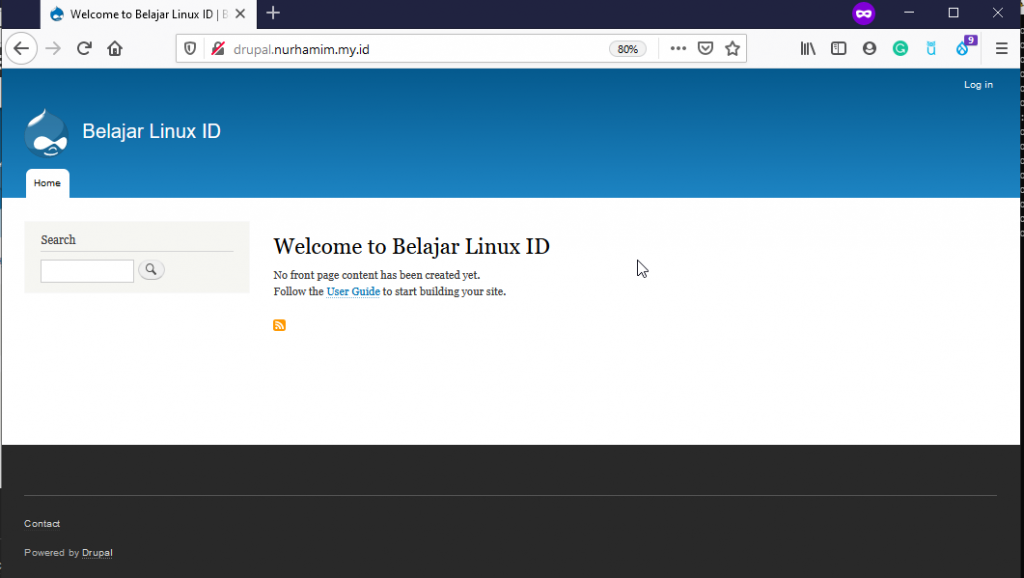
Selamat CMS Drupal sudah berhasil terinstall, berikut tampilan default dari Drupal.
Selamat mencoba 😁