Cara Instalasi Laravel Menggunakan Nginx di CentOS 8

Laravel merupakan salah satu framework PHP yang sangat populer dan bisa di bilang terbaik. Sudah sangat banyak para web developer menggunakan framework ini. Laravel sendiri open source dimana Anda dapat menggunakannya secara bebas.
Laravel sendiri mempunyai komunitas yang sangat besar, oleh karena itu sangat banyak yang merekomendasikan atau pertimbangan dalam memilih framework.
Pada tutorial kali akan dibahas bagaimana cara instalasi laravel di CentOS 8 menggunakan webserver Nginx, PHP versi 7.x dan database MariaDB/MySQL.
Untuk instalasi LEMP stack dapat mengikuti tautan berikut:
- Cara Instalasi Nginx Di CentOS 8
- Cara Instalasi PHP 7 di CentOS 8
- Cara Instalasi Database MariaDB di CentOS 8
Jika Anda sudah melakukan instalasi diatas, pastikan web server nginx, php-fpm dan database Anda running
1
2
3
4
5
6
7
[root@tutorial ~]# systemctl status nginx |grep Active
   Active: active (running) since Tue 2020-08-25 07:37:07 UTC; 5h 45min ago
[root@tutorial ~]# systemctl status php-fpm |grep Active
   Active: active (running) since Tue 2020-08-25 07:38:48 UTC; 5h 43min ago
[root@tutorial ~]# systemctl status mariadb |grep Active
   Active: active (running) since Tue 2020-08-25 07:37:13 UTC; 5h 45min ago
[root@tutorial ~]#
Php yang kami gunakan disini yaitu versi 7.4, silakan install module php berikut
1
2
3
4
5
6
7
8
[root@tutorial ~]# php --version
PHP 7.4.9 (cli) (built: Aug 4 2020 08:28:13) ( NTS )
Copyright (c) The PHP Group
Zend Engine v3.4.0, Copyright (c) Zend Technologies
    with Zend OPcache v7.4.9, Copyright (c), by Zend Technologies
[root@tutorial ~]#
[root@tutorial ~]#
[root@tutorial ~]# dnf install php-curl php-common php-cli php-mysql php-mbstring php-xml php-zip -y
Melakukan instalasi composer, nantinya kita dapat mengunduh file atau project laravel menggunakan composer
1
2
3
4
5
6
7
8
9
[root@tutorial ~]#
[root@tutorial ~]# curl -sS https://getcomposer.org/installer | php
All settings correct for using Composer
Downloading...

Composer (version 1.10.10) successfully installed to: /root/composer.phar
Use it: php composer.phar

[root@tutorial ~]#
Memindahkan file compos_er.phar_ ke /usr/bin/ dan memberikan permission execute.
1
2
3
4
5
6
[root@tutorial ~]# ls
anaconda-ks.cfg composer.phar original-ks.cfg
[root@tutorial ~]#
[root@tutorial ~]# mv composer.phar /usr/bin/composer
[root@tutorial ~]# chmod +x /usr/bin/composer
[root@tutorial ~]#
Menenutukan root direktori laravel dan install laravel
1
2
3
4
5
6
7
8
9
10
11
12
13
14
15
16
17
18
19
20
21
22
23
24
25
[root@tutorial ~]#
[root@tutorial ~]# cd /usr/share/nginx/
[root@tutorial nginx]#
[root@tutorial nginx]# composer create-project --prefer-dist laravel/laravel laravel

....
....
....

Writing lock file
Generating optimized autoload files
> Illuminate\Foundation\ComposerScripts::postAutoloadDump
> @php artisan package:discover --ansi
Discovered Package: facade/ignition
Discovered Package: fideloper/proxy
Discovered Package: fruitcake/laravel-cors
Discovered Package: laravel/tinker
Discovered Package: nesbot/carbon
Discovered Package: nunomaduro/collision
Package manifest generated successfully.
48 packages you are using are looking for funding.
Use the `composer fund` command to find out more!
> @php artisan key:generate --ansi
Application key set successfully.
[root@tutorial nginx]#
Jika instalasi sudah selesai dilakukan, silakan set permission dan owner laravel projek seperti berikut
1
2
3
4
[root@tutorial nginx]# chown -R nginx:nginx laravel/storage/
[root@tutorial nginx]# chown -R nginx:nginx laravel/bootstrap/cache/
[root@tutorial nginx]# chmod -R 0775 laravel/bootstrap/cache/
[root@tutorial nginx]#
Selanjutnya membuat database laravel
1
2
3
4
5
6
7
8
9
10
11
12
13
14
15
16
17
18
19
20
21
22
23
[root@tutorial nginx]#
[root@tutorial nginx]# mysql -u root -p
Enter password:
Welcome to the MariaDB monitor. Commands end with ; or \g.
Your MariaDB connection id is 10
Server version: 10.3.17-MariaDB MariaDB Server

Copyright (c) 2000, 2018, Oracle, MariaDB Corporation Ab and others.

Type 'help;' or '\h' for help. Type '\c' to clear the current input statement.

MariaDB [(none)]> CREATE DATABASE laravel;
Query OK, 1 row affected (0.001 sec)

MariaDB [(none)]> GRANT ALL ON laravel.* to 'user_laravel'@'localhost' IDENTIFIED BY 'new_password';
Query OK, 0 rows affected (0.001 sec)

MariaDB [(none)]> FLUSH PRIVILEGES;
Query OK, 0 rows affected (0.001 sec)

MariaDB [(none)]> quit
Bye
[root@tutorial nginx]#
Konfigurasi database laravel, silakan akses fil .env
1
2
3
4
5
6
7
8
[root@tutorial nginx]#
[root@tutorial nginx]# ls -lah laravel/ |grep .env
-rw-r--r-- 1 root root 849 Aug 25 08:52 .env
-rw-r--r-- 1 root root 778 Aug 11 17:44 .env.example
[root@tutorial nginx]#

[root@tutorial nginx]# vim laravel/.env
[root@tutorial nginx]#
- Before

- After

Pastikan Anda mengisikan nama db, username dan password dengan benar.
Jika sudah silakan membuat server block Nginx
1
2
[root@tutorial nginx]#
[root@tutorial nginx]# vim /etc/nginx/conf.d/laravel.conf
Berikut isi file server block Nginx Laravel
1
2
3
4
5
6
7
8
9
10
11
12
13
14
15
16
17
18
19
server {
        listen 80;
        server_name laravel.nurhamim.my.id;
        root /usr/share/nginx/laravel/public;
        index index.php index.html index.htm;

        location / {
                try_files $uri $uri/ /index.php?$query_string;
        }

        location ~ \.php {
                include fastcgi.conf;
                fastcgi_split_path_info ^(.+\.php)(/.+)$;
                fastcgi_pass unix:/run/php-fpm/www.sock;
        }
        location ~ /\.ht {
                deny all;
        }
}
Mengatur php.ini
1
2
[root@tutorial nginx]#
[root@tutorial nginx]# vim /etc/php.ini
Uncoment pada date.timezone dan cgi.fix_pathinfo
1
2
date.timezone = Asia/Jakarta
cgi.fix_pathinfo=1 >> cgi.fix_pathinfo=0
Selanjutnya pastikan tidak ada konfigurasi yang salah untuk server block nginx laravel
1
2
3
4
5
[root@tutorial nginx]#
[root@tutorial nginx]# nginx -t
nginx: the configuration file /etc/nginx/nginx.conf syntax is ok
nginx: configuration file /etc/nginx/nginx.conf test is successful
[root@tutorial nginx]#
Reload Nginx dan php-fpm
1
2
3
[root@tutorial nginx]#
[root@tutorial nginx]# systemctl reload nginx
[root@tutorial nginx]# systemctl reload php-fpm
Pastikan Anda sudah membuat A record untuk domain atau subdomain Anda yang diarahkan ke IP Public VPS/VM Anda, sebagai contoh

Verifikasi dapat dilakukan dengan ping

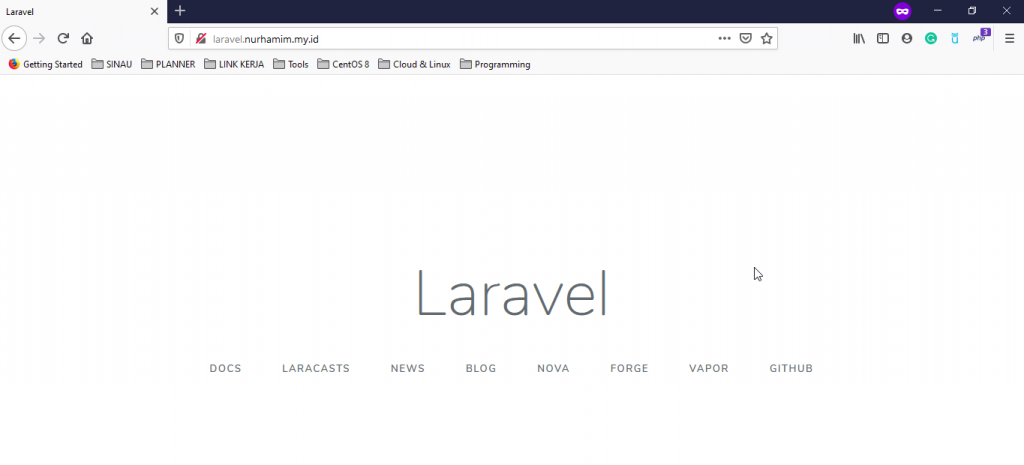
Jika sudah silakan akses subdomain atau domain Anda melalui browser

Selamat Anda telah berhasil melakukan instalasi Laravel
Selamat mencoba 😁

