Cara Instalasi SSL Letsencrypt pada WordPress Menggunakan Nginx di CentOS 8

Tutorial kali ini hampir sama dengan tutorial sebelum terkait instalasi SSL free di Laravel dimana Anda perlu install terlebih dahulu certbot dan membuat konfigurasi SSL yang akan disimpan di direktori snippets sebagai berikut
Instalasi certbot
1
2
[root@tutorial ~]#
[root@tutorial ~]# wget -P /usr/local/bin https://dl.eff.org/certbot-auto
Memberikan hak akses execute pada certbot
1
2
[root@tutorial ~]#
[root@tutorial ~]# chmod +x /usr/local/bin/certbot-auto
Generate OpenSSL
1
2
[root@tutorial ~]#
[root@tutorial ~]# openssl dhparam -out /etc/ssl/certs/dhparam.pem 2048
Membuat direktori letsencypt dan juga berikan akses nya
1
2
3
4
5
6
[root@tutorial ~]# mkdir -p /var/lib/letsencrypt/.well-known
[root@tutorial ~]# chgrp nginx /var/lib/letsencrypt
[root@tutorial ~]# chmod g+s /var/lib/letsencrypt
[root@tutorial ~]# chmod g+s /var/lib/letsencrypt
[root@tutorial ~]#
[root@tutorial ~]# mkdir /etc/nginx/snippets
Membuat direktori snippets yang akan digunakan untuk menyimpan configuration SSL nya
1
2
[root@tutorial ~]#
[root@tutorial ~]# mkdir /etc/nginx/snippets
Konfigurasi file letsencypt untuk kebutuhan verifikasi
1
[root@tutorial ~]# vim /etc/nginx/snippets/letsencrypt.conf
Berikut isi konfigurasinya
1
2
3
4
5
6
location ^~ /.well-known/acme-challenge/ {
  allow all;
  root /var/lib/letsencrypt/;
  default_type "text/plain";
  try_files $uri =404;
}
Membuat file konfigurasi ssl letsencypt
1
[root@tutorial ~]# vim /etc/nginx/snippets/ssl.conf
Berikut isi konfigurasi ssl nya, pada file ini Anda dapat mengubah atau menyesuaikan sesuai keinginan sepertihalnya header, protokol etc untuk SSL Anda.
1
2
3
4
5
6
7
8
9
10
11
12
13
14
15
16
17
18
ssl_dhparam /etc/ssl/certs/dhparam.pem;

ssl_session_timeout 1d;
ssl_session_cache shared:SSL:10m;
ssl_session_tickets off;

ssl_protocols TLSv1.2 TLSv1.3;
ssl_ciphers ECDHE-ECDSA-AES128-GCM-SHA256:ECDHE-RSA-AES128-GCM-SHA256:ECDHE-ECDSA-AES256-GCM-SHA384:ECDHE-RSA-AES256-GCM-SHA384:ECDHE-ECDSA-CHACHA20-POLY1305:ECDHE-RSA-CHACHA20-POLY1305:DHE-RSA-AES128-GCM-SHA256:DHE-RSA-AES256-GCM-SHA384;
ssl_prefer_server_ciphers off;

ssl_stapling on;
ssl_stapling_verify on;
resolver 8.8.8.8 8.8.4.4 valid=300s;
resolver_timeout 30s;

add_header Strict-Transport-Security "max-age=63072000" always;
add_header X-Frame-Options SAMEORIGIN;
add_header X-Content-Type-Options nosniff;
Edit dan tambahkan file snippets di server block Anda
1
2
[root@tutorial ~]#
[root@tutorial ~]# vim /etc/nginx/conf.d/wordpress.conf
Seperti berikut ini
1
2
3
4
5
6
server {
  listen 80;
  server_name laravel.nurhamim.my.id;

  include snippets/letsencrypt.conf;
}
Jika sudah reload Nginx
1
2
[root@tutorial ~]#
[root@tutorial ~]# systemctl reload nginx
Jalankan satu baris perintah berikut untuk mendapatkan SSL letsencypt
1
2
3
4
5
6
7
8
9
10
11
12
13
14
15
16
17
18
19
20
21
22
23
24
25
[root@tutorial ~]# /usr/local/bin/certbot-auto certonly --agree-tos --email me@nurhamim.my.id --webroot -w /var/lib/letsencrypt/ -d wordpress.nurhamim.my.id
Saving debug log to /var/log/letsencrypt/letsencrypt.log
Plugins selected: Authenticator webroot, Installer None
Obtaining a new certificate
Performing the following challenges:
http-01 challenge for wordpress.nurhamim.my.id
Using the webroot path /var/lib/letsencrypt for all unmatched domains.
Waiting for verification...
Cleaning up challenges

IMPORTANT NOTES:
 - Congratulations! Your certificate and chain have been saved at:
   /etc/letsencrypt/live/wordpress.nurhamim.my.id/fullchain.pem
   Your key file has been saved at:
   /etc/letsencrypt/live/wordpress.nurhamim.my.id/privkey.pem
   Your cert will expire on 2020-11-24. To obtain a new or tweaked
   version of this certificate in the future, simply run certbot-auto
   again. To non-interactively renew *all* of your certificates, run
   "certbot-auto renew"
 - If you like Certbot, please consider supporting our work by:

   Donating to ISRG / Let's Encrypt: https://letsencrypt.org/donate
   Donating to EFF: https://eff.org/donate-le

[root@tutorial ~]#
Noted: Ubah email dan sub domain atau domain Anda
Letak file CRT, KEY CA berada di /etc/letsencrypt/live
1
2
3
4
5
6
7
8
9
10
[root@tutorial ~]#
[root@tutorial ~]# cd /etc/letsencrypt/live/
[root@tutorial live]# ls -lah
total 4.0K
drwx------ 4 root root 82 Aug 26 07:25 .
drwxr-xr-x 9 root root 108 Aug 26 07:25 ..
-rw-r--r-- 1 root root 740 Aug 26 06:32 README
drwxr-xr-x 2 root root 93 Aug 26 06:32 laravel.nurhamim.my.id
drwxr-xr-x 2 root root 93 Aug 26 07:25 wordpress.nurhamim.my.id
[root@tutorial live]#
Selanjutnya menambahkan konfigurasi SSL di server block
1
2
[root@tutorial ~]#
[root@tutorial ~]# vim /etc/nginx/conf.d/wordpress.conf
Ubah dan edit server block menjadi seperti berikut:
1
2
3
4
5
6
7
8
9
10
11
12
13
14
15
16
17
18
19
20
21
22
23
24
25
26
27
server {
        listen 80;
        listen 443 ssl http2;
        server_name wordpress.nurhamim.my.id;
        root /usr/share/nginx/wordpress;

        index index.php index.html index.htm;

        ssl_certificate /etc/letsencrypt/live/wordpress.nurhamim.my.id/fullchain.pem;
        ssl_certificate_key /etc/letsencrypt/live/wordpress.nurhamim.my.id/privkey.pem;
        ssl_trusted_certificate /etc/letsencrypt/live/wordpress.nurhamim.my.id/chain.pem;
        include snippets/ssl.conf;
        include snippets/letsencrypt.conf;

        location / {
                try_files $uri $uri/ /index.php?$query_string;
        }

        location ~ \.php {
                include fastcgi.conf;
                fastcgi_split_path_info ^(.+\.php)(/.+)$;
                fastcgi_pass unix:/run/php-fpm/www.sock;
        }
        location ~ /\.ht {
                deny all;
        }
}
Pastikan konfigurasi nginx Anda benar
1
2
3
4
[root@tutorial live]# nginx -t
nginx: the configuration file /etc/nginx/nginx.conf syntax is ok
nginx: configuration file /etc/nginx/nginx.conf test is successful
[root@tutorial live]#
Jika sudah silakan reload Nginx dan php-fpm
1
2
3
[root@tutorial ~]#
[root@tutorial ~]# systemctl reload nginx
[root@tutorial ~]# systemctl reload php-fpm
Pastikan port 443 (HTTPS) listen
1
2
3
4
5
[root@tutorial ~]# netstat -tulpn |grep nginx
tcp 0 0 0.0.0.0:80 0.0.0.0:* LISTEN 74743/nginx: master
tcp 0 0 0.0.0.0:443 0.0.0.0:* LISTEN 74743/nginx: master
tcp6 0 0 :::80 :::* LISTEN 74743/nginx: master
[root@tutorial ~]#
Pastikan Anda menambahkan firewall juga di sisi VM. Disini kami menggunakan openstack dengan begitu untuk firewall dapat diallow di security group, silakan disesuaikan di sisi Anda.

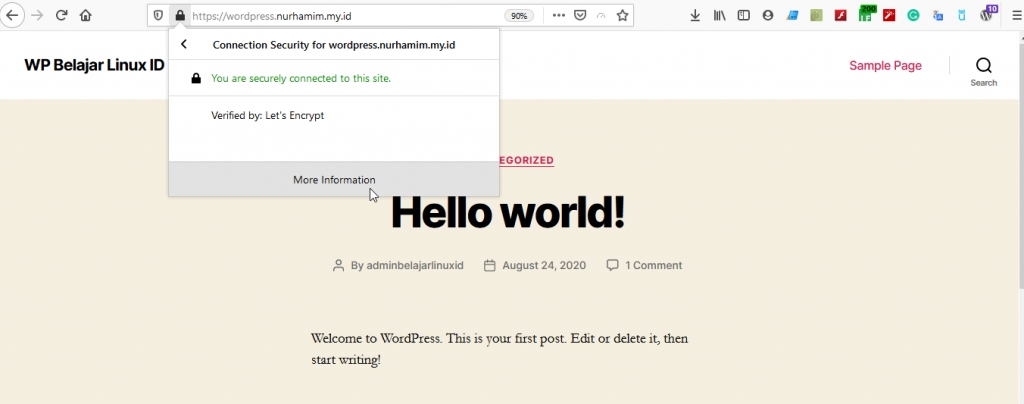
Akses URL wordpress Anda dari browser, hasilnya akan seperti berikut ini

Untuk test score SSL dapat menggunakan SSLLAB, berikut hasilnya

Selamat SSL Letsencypt WordPress Anda sudah terinstall.
Selamat mencoba 😁

